Mega menus
Mega menus are rich, full-width dropdown panels that replace the standard navigation dropdown for a top-level menu item. They display all nested menu items in an organized multi-column layout, and can include promotion cards and badges to highlight specific items.
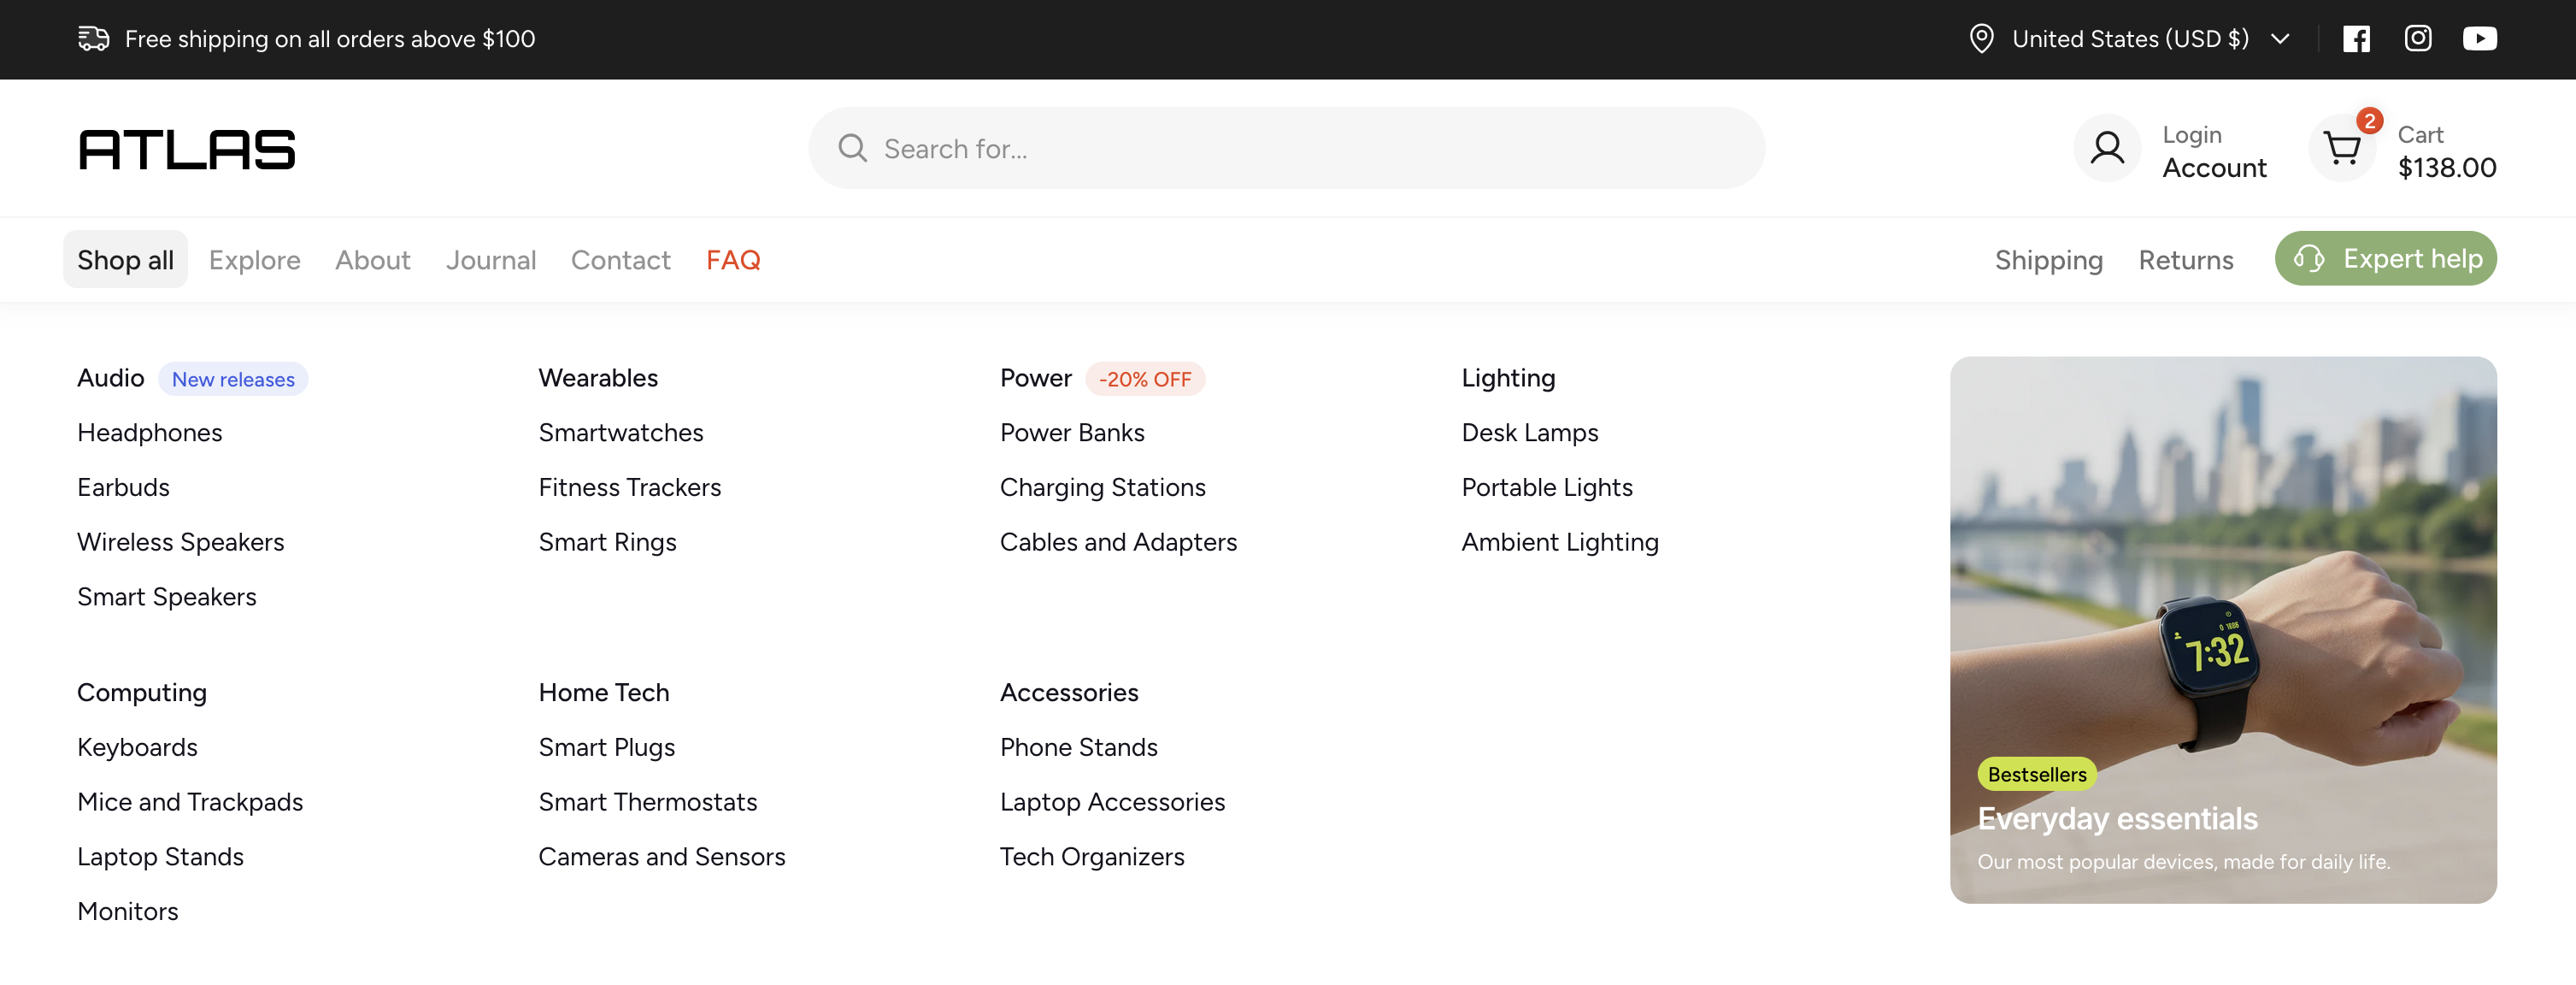
Creating a mega menu
Add a Mega menu block
- Open the Theme Editor and select the Header section.
- Click Add block and select Mega menu.
Assign it to a menu item
- In the mega menu settings, find the Menu item field.
- Enter the exact name of the top-level menu item you want to assign this mega menu to.
- Save your changes.
The mega menu should now appear when hovering over that menu item in the navigation bar.
Promotion cards
Promotion cards let you feature images and links inside a mega menu — useful for showcasing sales, new collections, or seasonal campaigns.
Add a Promotion card block
- In the Theme Editor, expand your Mega menu block.
- Click Add block and select Promotion card.
Configure the card
- Enter your content in the promotion card settings.
- Save your changes.
You can add multiple promotion cards to a single mega menu. In the mega menu settings, you can adjust how promotion cards are displayed:
- Layout — stack the cards horizontally or vertically.
- Size — control the size of the promotion cards.
Badges
Badges are small labels that appear next to a menu item inside the mega menu. They are useful for drawing attention to promotions, new arrivals, or limited-time offers.
Add a Badge block
- In the Theme Editor, expand your Mega menu block.
- Click Add block and select Badge.
Configure the badge
- In the Menu item field, enter the exact name of the menu item where you want the badge to appear.
- Enter the Badge text (e.g., "New", "Sale").
- Select a Color for the badge.